Successful Flower Growing
Growing Rose Plants
A rose is usually left in place for many years, so good soil preparation before planting is important. Soil type and pH are relatively unimportant, but a good supply of food is required to keep your rose healthy and flowering well.
When preparing the ground for roses dig fairly deeply, a full fork depth will suffice and incorporate as much manure or compost as you can as well as some slow release fertiliser such as fish and bone.
If your rose arrives in bare root form, do not let the roots dry out, and in any case give the whole plant a thorough soaking before planting. Planting should see the grafting joint below soil level, just below in mild areas of the country, but up to 10 cms below in areas where winters are harsh.
After planting, water well and mulch with your preferred material, manure, compost, bark are all acceptable. Flowering will be improved if the plants are fed every year with a layer of compost/manure or failing that a proprietary rose fertiliser scattered around the plant 3 or 4 times between early spring when growth is starting and early September.
Deadheading is important to maintain flowering of the perpetual varieties, and try to keep the area around the plants free of old flowers and dead rose leaves as these will encourage black spot on the leaves. Keep well watered and mulched and your roses will be happy and repay you with stunning flowers all summer.
If you follow all this advice your roses should grow strongly and be pest- and disease- free. However, aphids are always a risk and if you get a severe attack some sort of spray will be needed.
Growing Climbing Roses
You should understand the difference between climbing roses and rambling roses – climbing roses have stiffer stems and flower repeatedly with large flowers. Rambling roses have less rigid stems, flower once (but usually with massive numbers of blooms) and the flowers are smaller. If you are looking to cover a fair size trellis or tree growing one or more of each can be very effective.
Like all good theories, there are exceptions. Rambling Rosie is a red rambler, also repeat flowering and scented, Bobbie James is white, very fragrant, very vigorous (up to 10 metres) but only flowers once.
If you are looking to grow a rose up a wall where air circulation will be limited, choose a climber rather than a rambler as they are generally much less prone to mildew. My personal favourite is Teasing Georgia (David Austin), a highly perfumed, yellow repeat flowering rose up to 4 metres.
Weeping Roses are created by grafting a rambler onto a rigid stemmed rootstock. The important thing here is to stake the stem very firmly and to tie the stem to the support near the top as well as about 15 cms from soil level. An umbrella shaped wire frame will keep the weeping bits in order
Ground cover roses form dense mats of foliage and can look great covering a tree stump or other unsightly mound. Some are repeat flowering and some are fragrant. If you want to cover a large area, consider using a climber or rambler with no support.
Miniature roses are 15-50 cms tall and are effective in indoor plantings raised beds and alpine gardens.
Patio roses are a bit bigger, typically 40-50 cms high, suitable for growing in containers (many roses are not). They are repeat flowering and frequently scented.
Hedging roses are frequently varieties of rosa rugosa with its winter hip interest, but many of the compact floribundas such as Iceberg and Masquerade are equally suitable.
Growing Hebes
Hebes are excellent shrubs for most gardens, they are easy to grow, are evergreen, are tolerant of salt laden winds, come in a range of sizes and forms, many have stunning shows of flowers and are just about the easiest plant to propagate by cuttings. Their one disadvantage is hardiness the larger varieties are only half hardy and will not stand prolonged very cold spells, here in Yorkshire we lost about a quarter of our hebes a number of years ago when temperatures went down to -15.
Hebes are natives of the southern hemisphere, especially New Zealand, but some come from the Falkland Islands, so obviously these are hardy!
No special ground preparation is necessary, but normal digging and addition of manure or compost will guarantee fast and healthy growth and a good show of flowers. Varieties are available to suit any soil type from alkaline chalk to acid clay. Whilst all hebes like sun , light shade is acceptable to many varieties. Bees and butterflies are attracted by most hebe flowers.
Hebes mostly flower in June and July, but you can extend the season to start in May with Hebe Pinguifolia Pagei (white flowers) and to end in October with Caledonia (purple flowers) and Champagne (white flowers). A few hebes are scented such as Midsummer Beauty (purple), hebe odora, blue clouds and salicifolia
Growing Dahlias
All dahlias are frost tender and so in most parts of the UK need to be brought inside in winter. There is, however, a bedding strain developed since the 1920’s which are treated as half hardy annuals and raised from seed each year. Most bedding dahlias are smaller, typically 10 cms tall, and not as showy as tuber based dahlias, and as a result lack the passionate following that the latter have.
Dahlia seeds do need a temperature of about 18oC to germinate, so unless you have a very warm spot, a heated propagator is the thing to use. Once seedlings are developed sufficiently they should be pricked out into small pots and left to grow on in a reasonably warm atmosphere the warmer they are, the faster they will develop. I prefer to place individual seeds (they are quite large) into individual cells in a 12 unit tray and then plant out into a 5 inch pot as the roots need a lot of room.
As with all bedding plants, pinch out a couple of times as they grow to promote bushy growth which will increase the flower density later in the summer.
Do not plant out until danger of frost is passed, usually the end of May, and plant out into a soil that will not dry out. Keep plants well watered all summer and you will be rewarded with a stunning display of flowers which are very suitable for cutting and bringing indoors.
Growing Clematis
When you buy clematis the label will tell you which group it is in. It is important to make a note of this as the method of pruning varies between the three groups.
Group one clematis flower early in the year on wood that grew in the previous season, any evergreen clematis are group one. These need no special pruning, but can be lightly pruned to keep them tidy, and occasionally some stems can be cut out to prevent overcrowding.
Groups two and three require basically similar pruning. At the end of winter when buds are livening up (usually February) cut group two back to by a couple of buds, then short shoots will develop that will bear the flowers in May or June. If you also cut the dying flowers off, you may get a second flush.
Group three clematis have either large showy or smaller fragrant flowers from July onwards; these should be taken back to the lowest healthy buds, ideally about 20 cms above the ground, do this in February like group two. Group 3 clematis flowers at the ends of the shoots, so failure to prune will result in all the flowers being a long way from the ground and possibly out of sight.
Plants for wet garden soils
Some plants like to have permanently very damp, but not waterlogged soil, so if you are working under anything like heavy tree cover there will be a tendency to dry out in the summer so significant irrigation may be required.
There are several groups of plants which will thrive in these conditions, the easiest of which are the ones which grow naturally at the edge of water, things like reeds, bulrush, teasel and alder and silver birch trees. These are the plants to form your landscape with and you can then interplant with more decorative species.
On the large side gunnera manicata with its massive leaves and alien looking flower spikes is dramatic, but you need a large space and to be aware that it is seriously prickly; gunnera magellanica is a much smaller plant whose leaves are 6 cm across rather than 120 cm. Rodgersias also have large leaves but are more manageable than the larger gunnera, and both thrive in boggy conditions. Hostas have interesting leaves and some will flower reliably.
To bring a bit of colour into your boggy area the choice is wide. Astilbes with their feathery flowers in late summer and autumn are a classic, as are the primulas especially candelabras and sieboldii. Irises and myosotis (forget-me-not) will again do very well.
Less well known for thriving in very damp conditions are ligularias, lobelia cardinalis, and euphorbias.
There are some grasses that are suitable especially carex and if you want a larger grass spartina pectinata aureomarginata is quite spectacular. Ferns such as matteuccia and osmunda are usually reliable.
Where to grow Plants
The obvious answer to this is as close to the kitchen as possible and while it may be possible to have a herb bed just outside your kitchen door, in many cases more distant sites may be more practical. Other considerations are also important.
Mint, probably the most used herb, is extremely invasive, and left to its own devices will completely take over a herb bed in two or three years. For this reason it is best grown in a container, and you can site this anywhere you like. A one foot (30 cm) square container will provide a good quantity. Containers may also be used for any number of other herbs, but bear in mind they will need a lot of watering in the summer. Another spreading herb is chives, but this is not nearly so invasive and does not need containing
Some herbs, notably thymes and marjoram (which, like mint and chives, are perennials) are low growing and can look good growing at the side of a path or driveway where they will spill over and soften the edges.
Some shrubby herbs can grow large up to a metre high and across and need siting with care so that they have sufficient space. Such herbs include sage, rosemary, and fennel.
Many other herbs are smaller and annuals and it is classically these which are planted in a herb wheel basically a circular design with different section for different herbs here think of parsley, dill, basil and so on.
Your final option, and a very acceptable one is to include your herbs in either the vegetable garden or the flower beds. Some like thyme have flowers and are very attractive to insects, and others like fennel have very attractive feathery foliage.
One final word about the herbs sold by supermarkets for your windowsill, these are frequently poorly rooted cuttings and may not survive long. They will last longer than cut herbs, and if they are well rooted and you can thin them out into a container 2-3 times the size of that provided you may just manage to get a reliable supply for a few months. Good luck!!
Successful Trees\n
A with shrubs, trees will provide a garden with both structure and decoration and can be very low maintenance.
The most important thing with trees is to get the scale right, do not plant a cedar tree in a small garden; in 20 years time you will have room for little else and you will have lost most of your light and any friendly neighbours! Also the roots may inflict structural damage on your house. Most deciduous trees are as wide as they are high when fully grown, so find out how tall your chosen tree will be after 20 years, plant it at least that distance from your house, and at least that distant from any boundaries with other peoples gardens.
When planting, dig a hole a least twice as big as the pot or root ball that comes with the tree. Fill half the hole with compost or manure and work this into the soil around the edge and at the bottom of the hole. Take the tree from its container and tease out some of the roots, if the roots are in a very tight ball you must work hard at this or the shrub will not survive long. Place the shrub in the hole and fill with the soil/compost mix. Firm down the soil around the shrub by standing on it with your full weight.
Knock in a stake at 45 degrees on the windward side of the tree. The stake must go at least 18 inches/450 mm into the ground. Attach the tree to the stake 6-9 ins/15-25 cm above soil level using a proper tree tie. What you are doing here is stopping the trees roots moving in windy weather until they get a firm grip on the soil, it is important that the upper trunk is allowed to bend in the wind, as this will strengthen it. Finally give the tree a good drink, at least 2 gallons, of water. If you have rabbits fit the new tree with a rabbit guard for the first year or two. Likewise if you have deer they will need to be kept away.
The stake can come out if the tree is small, and in a sheltered spot after a year, otherwise give it two years.
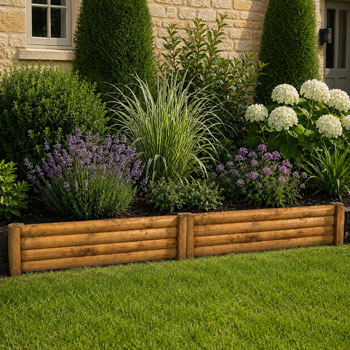
Successful Shrubs
Shrubs can provide a garden with both structure and decoration and can be very low maintenance. A small amount of effort will, as always, be handsomely rewarded.
If low maintenance is important to you then aim to plant your shrubs through weed suppressing blanket, if not either into a heavily mulched shrub bed or in a weed-free (and grass-free) circle the same size a the shrub’s canopy.
Dig a hole a least twice as big as the pot or root ball that comes with the shrub. Fill half the hole with compost or manure and work this into the soil around the edge and at the bottom of the hole. Take the shrub from its container and tease out some of the roots, if the roots are in a very tight ball you must work hard at this or the shrub will not survive long. Place the shrub in the hole and fill with the soil/compost mix. Firm down the soil around the shrub by standing on it with your full weight.
Next you should take about one third off the length of each of the main shoots, this will decrease the need for water whilst the roots are establishing and once they are established will speed up growth. If you are planting a bare root shrub in Summer cut off two thirds of all shoots.
Finally water with between one and two gallons of water depending on size of the shrub and dampness of the soil. Keep the plant well supplied with water for its first season.
Shrubs like to be pruned, and it’s easy. If the shrub flowers before mid-June it is flowering on last year’s wood, so cut back main shoots by one third after flowering. If it flowers after mid June it is flowering on this year’s wood so cut back the same amount in late autumn or winter. If you want to prune more to gat the size and shape, do it at the same time. Simple.
Successful Flowers
A stunning display of flowers is nearly as easily achieved as a poor one, so take a little care, and invest just a little time and the results will be rewarding.
First choose plants that grow well in your climate and your soil type, a look at neighbouring gardens and a small amount of research will get you most of the way there, but fine tune your knowledge through experience and don’t persevere with things that don’t thrive.
When you prepare your flower beds pay attention to soil structure and acidity as described in the article on growing vegetables. But if you plan to grow perennial plants you will not be digging over the soil each year so it is important to try to get rid of all perennial weeds (grass, thistles, nettles, dock etc), and also work in 4 ozs/120 gms per square yard bone meal. This is a slow release fertiliser and should keep your plants going for some time.
Raise your plants early if you have a greenhouse or cold frame and plant out hardy plants in early April, and tender ones at the end of May (protect them if you are threatened with a late frost anything will do- fleece, an old sheet, newspaper etc). When you plant out dig a hole twice the size of the rootball and incorporate compost or manure into the soil around the hole, then plant. Water all plants in a pint/half a litre per plant. Plant densely, space between plants gives weeds more opportunity to thrive.
Keep weeds well away from the plants and ideally put a 2 inch deep mulch of compost round each plant. Never let the soil dry out, and if you have to water always add a little tomato fertiliser to the water. Tomato fertiliser is high in potassium which encourages flowering. In any case water with tomato fertiliser once in June, twice in July and August and once in September.
Remember that your plant is producing flowers to make seeds to guarantee the survival of the species. Once the seeds are set, the plant’s energy goes into ripening the seeds, at which point the plant feels its job is done and it dies. This is not what you want; you need the plant to flower continuously for some months, so you must remove dead flowers as soon as they die and before seeds are set.
Follow these simple instructions and you will have every reason to be proud of the results