Installing Log Rolls
How to fit Log Rolls
Installing Log Roll Products
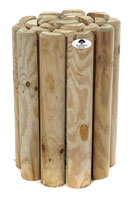
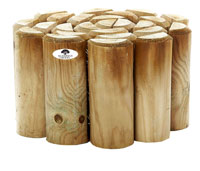
Log roll products are installed by attaching them to metal or wooden (50mm x 50mm) pegs driven into the ground. Obviously the larger the log roll the greater weight of soil it is likely to be retaining and so the better staking it will require. As a guide up to 6 or 7 inch (150-175mm) log roll will just need two pegs, one at each end, and two nails/screws to attach the roll to the peg. Larger log rolls should have 3 pegs per length, one at each end and one in the middle, and the largest rolls should have 3 screws to attach the roll to each peg.
If your log roll is more than 10 ins (250mm) high do consider using extra support for the retained soil, above 18ins (450mm) extra support is definitely recommended.
Stakes should have at least one third of their length in the ground, and should be knocked in until the top of the stake will be just below the top of the log roll.
If you are using the roll as an edging then dig a trench where you want the roll to run, the depth of trench will depend on the height on the log roll you have and how much of it you want showing above the ground. Ideally aim to have 50-75mm (2-3ins) below ground level.
Make sure the bottom of your trench is level by running a marked stake along the length. The roll is very flexible, so curves are quite OK.
Knock your first stake into the ground about 50mm from the front edge of the trench right at the beginning of the trench, so that the roll will sit in the trench, in front of the stake. Now position the roll where you want it and gently tap the log by your stake to get just into the soil at the bottom of the trench.
Now attach it to the stake with one nail or screw (if using metal stakes nail from the back, through the holes in the stake into the log roll; if using wooden stakes drill the stake and screw into the log roll).
Now using a flat board on top of the log roll, tap along the length to get the tops all the same height and horizontal. Then drive in the stake at the other end and attach the log roll to this.
Check that everything is as you want it, then use the second nail/screw for each stake, and add the third, central stake if required.
Finally back fill the trench and any gap at the front of the roll.
Note if you are joining another log roll to make a longer edging and you are using wooden stakes you can position the stakes so that both log rolls use the same stake.


